Sienci Labs will be closed on Friday, April 3 for Easter weekend. Customer Support services will not be available. Orders can be placed as usual. Please use our online resources and help videos until the team is back on Monday, April 6. Dismiss
Hey everyone, here’s our February production update.
For previous production updates and other company news, feel free to check out our blog.
First batch of LongMill MK2 boxes
COVID 19 – another wave passes
COVID19 numbers in Waterloo ON.
COVID 19 hit us hard in January, with several of our staff, including myself, contracting the virus. This meant that many of us were off work or working from home. With the nature of our work being fairly hands-on, it took a bit of time to adapt, but luckily this wave has passed and everyone is back to work. Thankfully, symptoms for everyone were fairly mild and I am happy that everyone is ok.
General production updates
This past month has been especially hectic as we work to scale our business and production. The first area of growth is in our team, with us onboarding six new employees and two co-op engineering students over the last month and a half. By increasing the size of our team, we hope to be able to pack and ship products faster, keep a closer eye on quality control, and improve the speed and quality of our customer and technical support.
Our second area of growth is in our space and capacity. Although we are in the same space, we added two shipping containers for outside storage and also had a forklift delivered to the shop today. We are limited by space inside, but we’ll be able to move some of the materials outside in the parking lot, such as 3D printer filament, aluminum rails, and motors, that are not affected by the cold and take up a lot of space.
Sea cans and forklift
In the long term, I feel that we’ll have to expand to a new space. Given the growing number of products, staff, and items we have to house, we’ve reached the capacity our current space can offer. This will be something we’ll be looking at doing over the next year.
As has been the common theme for the two years, we continue to struggle through supply chain issues and shipping delays. Many of the parts that we were expecting at the end of January have now been postponed into February. This to some degree will affect the shipping time for some of our items. More info about parts delays will be included below.
LongMill MK1 Production
We’ve been making good progress in shipping the last of the LongMills in Batch 5 and have around 50 machines remaining. We are planning to have another 20 machines shipped this week, but we may be affected by snow, as we’ve received a weather warning that there will be 15-20cm of snowfall. We’re providing staff work that can be done from home, but the number of machines we ship this week may be affected by the weather.
At the time of writing, we have a new supply bottleneck, the power supplies. Another batch of power supplies was expected to be delivered at the end of January. However, we’ve been notified that the shipment has been delayed until the end of February to the start of March. Currently, we have enough power supplies to ship the rest of the machine for this week, but the last 10-15 orders will have to wait until we get more. I will be working with our suppliers to possibly expedite another batch of parts to finish with the rest of the orders.
LongMill MK2 Production
We continue to wait for parts to arrive for the LongMill MK2. We now have a portion of the materials needed for MK2 production, but some parts, including power supplies, gantries, inside packaging, cables, and a few other things are still in transport and are expected to arrive this month.
Email updates from the shipping companyContainer tracking
Given the current status of the shipments, we expect that MK2 will ship closer to the middle to end of March at this point. Based on the estimated arrival dates, it appears that the power supplies are likely to be the last set of parts to arrive. We’ll be contacting our suppliers to see if it is possible to expedite a second batch as well so that we can possibly ship machines earlier.
We are now packing and assembling sub-components of the kit, including spacers, couplers, v-wheels, printed feet, lead screws, drag chains, and more in preparation for shipping of the MK2.
LaserBeam Production
We are now packing, assembling, and packing LaserBeams for orders placed in November, and have currently shipped around 300 units. Ikenna and the rest of our team continue to develop new resources for the LaserBeam system in the resources.
We are now waiting for new drivers and power supplies to arrive to ship orders placed between November and January and are scheduled to ship at the end of February. New orders placed today and onwards are expected to ship by the end of March.
LongMill MK2 48×30 and Extension kits
Our first half of parts for the 48in X-axis for the LongMill MK2 are on the way and are expected to arrive in the next two weeks. We will be testing and checking the parts to make sure that they are to spec and work correctly. Once the testing is complete and all the parts work successfully, we will start to open up for the 48×30 version of the machine as well as the extension kits. This is expected to happen at the end of February.
There are still a couple more kinks to work out with the larger X-axis, such as:
Longer wiring or wiring extensions for the motor, router, and inductive sensors
Adapters for using the original X-axis with the new rail and nut design
Development for these parts still needs to happen. Based on my estimates, I expect we will be able to ship the first extension kits out sometime in May.
We’ll be putting out more details as we continue with the development.
An example project sent in by Andy Mctaggart, one of our beta testers
Pending LongMill orders
If you placed an order for the original version of the LongMill and you’re in the queue here, we are working on packing and shipping your order. We have been delayed in shipping the remaining LongMill orders as the couplers which were estimated to arrive on December 30, 2021 have been delayed. Due to the delay, we have ordered a rush batch of couplers which are expected to arrive around Jan 12th, and shipping for LongMills will be temporarily halted until the couplers arrive.
We’ve sent customers who are expected to be affected by this delay emails over the holidays to let them know ahead of time. We are currently assessing estimated delivery times for the remaining orders and will provide customers with updates soon. We’ll be updating order statuses on our Forum and our new Order Status page.
Response times for customer service (emails, tickets, and phone calls)
We have been overwhelmed with emails, tickets, and phone calls from customers, especially as we get caught up with messages that have come in over the past week while our offices were closed. We are working hard to respond to all of our customers, however, it may take longer than usual to get back to everyone. Thank you for everyone’s patience.
COVID situation
COVID 19 cases in the Waterloo region have seen a large increase in recent weeks. We recently had one of our employees coming back from vacation test positive for COVID 19. Fortunately, they were not exposed to everyone else at the shop as they tested positive before they came back to work, but it feels that a potential outbreak in our workplace becomes more and more likely as the pandemic becomes more severe.
To help keep our employees safe, we are pushing more of our staff to work from home. We are continuing to work to help set more of our staff to work from home and reduce the number of people at our office.
We continue to ask folks that are picking up orders from our office to stay inside their vehicles for pick-ups instead of attempting to enter our building without permission.
Lead times for LongMills and LaserBeams
We continue to wait for parts to arrive for the LongMill, LongMill MK2, and LaserBeam kits and ship products out as materials come in and get processed. We’ve created a new system for people to see the status of their order and see where they are in line for shipping.
Doing customer service when lead times are long for your products is particularly challenging for a number of reasons, including:
Folks are antsy about when they are going to get their machine, especially since they spent hundreds if not thousands of dollars on something from a random company on the internet (us)
It’s hard to keep track of when the order was placed and when it’s supposed to show up, as well as remember the estimated delivery time that was promised
There’s a lot of anticipation and excitement built up, which quickly turns into frustration when there are delays
Folks want to get their things to line up with their personal lives, such as with holidays and vacation time
We made some mistakes in terms of communication and setting expectations with our customers on when their machines would get delivered. For example, we said that we could ship a certain number of machines per day, so customers were expecting us to be shipping that number every day. However, because the number we can ship is limited to other factors, such as parts availability and the number of machines that the couriers can take that day, we were not clear on the fact that the number that we said we could ship was not always the number that we actually shipped. Some of our customers were calculating the number of days they would be waiting to get their machine based on the best-case scenario.
More realistically, customers should be planning their delivery based on the number of weeks that we advertised on our order page at the time the order was placed. Typically, the lead time will be stated as a range of weeks, such as 4-6 weeks.
The second mistake was how I sent the email out about the delay on the couplers. As some folks may know, the shipment of couplers that were slated to arrive on Dec 30, 2021, but was delayed until the middle of January. I emailed customers that this may affect the delivery time of their order. This email was only sent out to a small handful of customers who would potentially see that their orders would ship outside of the initial lead time that was promised, however, customers who the delay would not be affected also were upset that delays were happening, even though it would not affect the delivery time of their order as it is scheduled to ship later.
Our team is working to find new ways to improve transparency and communication with customers, but in the meantime, we’ve created a simple auto-updating list for new orders.
Our goal with this system is:
Customers can see what the status of their order is at any time, reducing the need to contact us directly about the order
They can see what the lead time was and how much time had elapsed, providing clarity on what delivery time was promised and if we are meeting them
Creating this system was actually a bit eye-opening as well. Given how much pressure we were putting on ourselves to ship quickly and manage customers with high expectations, we were feeling that we were always missing shipping deadlines. Now that we can visually see how much time had passed, it appears that we’ve been shipping almost all of our LongMills within our estimated times.
Hey everyone, Andy here. I know lots of folks are excited about the LongMill MK2. I wanted to create this post to give everyone as much information about the LongMill MK2, the successor to the popular LongMill we released in late 2019. Initially, we were planning on getting all of the marketing materials ready for the MK2 ready before the launch, but we’ve been getting so many emails and calls from people wanting to place a pre-order for the MK2 now, that we’re going to open up the pre-orders early, and slowly put out all the flashy stuff later.
This post will contain all of the meat and bones, from information about the development of the machine, all of the changes and considerations between the old and new machine design, production schedules, FAQs, and more. Hopefully, I’ll be able to answer all of the possible questions you might have before placing an order, as well as show all of the hard work that the engineering team here at Sienci Labs has put in over the past year to bring you the MK2.
Our prototype of the LongMill MK2
Before you order…
Please note that:
LongMill MK2 resources are a work in progress and will be released at the end of January.
Machines are estimated to start shipping mid-February, but may extend to the end of March based on delays in production and shipping.
Only the 12×30 and 30×30 versions of the LongMill will be available at the current time. LongMill 30×48 and extension kits will be available for pre-order in February.
Why the MK2?
The idea of creating a newer updated version of the LongMill using custom extrusion was proposed by Chris in late 2020. We started researching and exploring the process of manufacturing aluminum extrusion, as well as making batches of extruded aluminum products just as the T-track and the LongMill angle aluminum rails.
When we first started Sienci Labs, we found that using angle aluminum turned on its side provided a sturdy, simple, and affordable way to create a linear motion system. Given that aluminum angle extrusion was readily available off the shelf, we were able to create both small and large batches of rails quickly and easily, without worrying about custom tooling and MOQs. I would attribute this factor as an important reason for getting us to this stage in our company, as we were able to continue to scale our production as we continued to build more CNC machines.
The first area to talk about would be the accuracy of rails over high volume. In 2020, we encountered a new problem. While all of the angle aluminum we had received in previous batches were made to high tolerances, we had received a new batch of material that varied in the length of each arm and angle, causing less than an optimal fit of v-wheels. This gave us an opportunity to look deeper into tolerances in extrusion manufacturing as well as perform additional quality checks to ensure each rail was made to a high degree of accuracy. We also learned that it would be a reality that at high volumes, it would be important to ensure we tackle issues at the production side with our manufacturers, since we couldn’t trust them to make every rail perfectly unless we provided the correct specifications for the rails.
This lead us to make our own “custom” angle aluminum. Basically, we arranged production of the angle aluminum using a new die made specifically for us at a higher tolerance than the industry standard, as well as extruding the material at precision spec. With these changes, we were able to reduce the number of out-of-spec rails to near zero. This also set up a better understanding of the extrusion process and the process and costs involved in it. It also gave us a chance to work with the extrusion manufacturer to work out design kinks and set us up for future development.
Today, we use tens of thousands of pounds of aluminum a year to make our rails, way higher than practical MOQs for producing custom extrusion. Because we use so much aluminum, the cost of the dies and tooling became negligible compared to the overall cost of the extrusions. So let’s talk about why custom extrusion makes sense, and some cons/downsides as well.
Improved performance
Designing our own custom extrusions lets us create a design that is more optimal for rigidity than angle aluminum. Chris conducted dozens of simulations and tests to find the most optimal designs for the new rails. Based on the results, we can expect 2-3 times less deflection in the rail than the original design. I would note that these are simulations, and real-life results are likely to show less of a difference since the numbers do not reflect deflection from v-wheels, linear guides, and other parts in the machine.
Comparison spreadsheet of different extrusion designs
This is especially important as we continue the development of larger versions of the LongMill since longer rails inherently have more deflection.
Ease of assembly
The new extrusions also include additional features that will make it easier to assemble and require fewer parts. For example, by including tapped holes on each face of the extrusions, users will be able to mount the rail to the gantry plate without any brackets. Each rail also has a t-slot, so all drag chain components can be mounted without additional tapped holes. Overall this will reduce the number of fasteners needed, the number of unique fasteners, as well as assembly time and complexity.
Improved scalability
Although time will have to tell, we expect that the new rails will be easier to produce on a larger scale. Since we already need to custom manufacture our own angle aluminum, lead times for both the angle aluminum and custom extrusion are the same. Since the custom extrusion requires less machining, we expect it to be slightly easier and less expensive to process the rail after it has been extruded. Also, since the rail requires fewer parts and a lower number of unique parts to put together the overall machine, it will save time and effort in sourcing and purchasing as well.
We are also working on cutting and tapping rails in-house, allowing us to have more flexibility in the sizes and variations in the machines we produce as well.
Less production flexibility and a step away from replicability
Since angle aluminum is a fairly universal product that can be purchased off the shelf, a determined maker should be able to replicate the rail design of the LongMill and make their own custom machine from scratch. It would be much more difficult to replicate the new custom extrusion, as the costs to produce a small number of rails are incredibly high. This, I feel, is a step away from the openness of the platform. We will continue to fully open-source the designs as we have always done, but part of the open-source movement is considering the replicability of the product. This was an important consideration when we started this development, and these are some considerations and why we made this step:
The number of people who make their machine from scratch is incredibly low. While there are people who use the LongMill design to make their own machine, making the designs available for this purpose serves a very small population.
The net benefit of having a simpler, better machine that is more easily scalable provides more benefit in our goal to make CNC accessible to beginners than to have a machine that can be made from scratch.
Most people who make modifications to their machines generally do it after they purchase and assemble a manufactured kit. Continuing to make the design public will continue to support people who wish to simply modify a kit
Building a machine from scratch generally costs more and will not perform better than a stock LongMill. We have extensively optimized the design and put an insane amount of thought and consideration to the quality of each part. Parts such as the couplers, Delrin nuts, and even the 3D printing filament are all custom made specifically for us at a higher tolerance than off the shefl components. Since we work within high volumes, we are also able to take advantange of economies of scale that do not come with buying parts in small numbers. Because of this, I believe that folks who want to build a machine from scratch would only benefit if they plan on making extensive changes to fit a specific need, or are doing it for the fun of making the machine. There are of course other designs and options that people can build besides the LongMill that lend itself in being made from scratch.
Backward compatibility
While the rails have been designed to be as backward compatible as possible, and many of the old LongMill parts can be used on the new rails, this brings up another important debate, which is “is it better to take apart and modify an old LongMill to put new parts on it, or is it better to buy a new one?” This is what I think.
First of all, if you already have a LongMill and are happy with the current size of it, I believe that keeping it the way it is and continuing to use it is the best option. While the newer versions of the LongMill will perform better, not only does the current version work well already, the extra cost to switch over parts isn’t worth the extra performance you may get. Instead, investing in other things, such as better tooling, software, and materials for projects may give a better return on investment. It should also be noted that the price of the MK2 LongMill will be higher than the current LongMill, so that we can account for changes in material prices, cost to build the machines themselves, and inflation.
If you are wanting to upgrade the machine to a larger size, then the debate gets a little more tricky. If you take apart your old LongMill to swap in new rails and lead screws, you’ll be left with a lot of leftover parts. Instead, it may make more sense to sell the LongMill and buy a whole new machine instead. So the formula would go:
(Cost to buy a larger LongMill – Price you sell your old LongMill) v.s. Price of the upgrade
I personally like the idea that instead of having this be an opportunity for a new user to scoop up a used LongMill at a discount so that they can get into the CNC hobby and prevent having a bunch of unused parts lying around. The net number of machines is one instead of two.
Of course, we will offer both an upgrade kit and full kit options to customers. These parts are interchangeable between all generations of the LongMill:
Motors and electronics
Lead screws, couplers, and nuts
V-wheels, fasteners, and eccentric nuts
XZ gantry assembly
Drag chains
Beta Testing
To assist with the development of the LongMill MK2, we recruited several beta testers. We provided our testers with prototype versions of the LongMill MK2 30×30 for testing and use in their personal shops as well as one-on-one assistance from me directly and the rest of the engineering team.
Thank you Dale, Andy, and Ed for being our guinea pigs.
Andy and his father assembling their MK2Dale, finishing up the wiring on his beta machine.
Our beta testers were responsible for several tasks, including:
Putting the machine through its paces
Reporting back to us with feedback on a regular basis
Letting us observe and test their machines
A couple of key areas we wanted learn were:
What are the best ways to assemble the machine? How can we make the assembly faster, easier, and less prone to error?
What sort of long term use and maintenence concerns would there be?
How much of a performance difference is there between the two machines?
Are there any design improvements we can make before production?
Here are some things we learned:
Average assembly time between all of the beta testers were 2-3 hours, an overall improvement of from 4 hours that most users report spending to assemble their LongMill.
Wear and tear and maintenence is expected to be similar to the original LongMill, especially since it shares the same motors, lead screws, and delrin nuts.
Ed and Daniel (one of our engineers) figuring out the wiring on their LongMill
Overall, the engineering team here at Sienci Labs did an excellent job designing a worthy successor to the Longmill MK1. I was impressed on how easily everything came together. Overall, we faced very few issues in the beta testing phase of development, especially compared to the initial beta testing of the LongMill MK1. I believe this is a testament to our growth in experience and knowledge gained over the last three years of LongMill MK1 development and production.
How is the MK2 better?
The MK2 is an improvement to the current LongMill in these ways:
Fewer overall parts and a simpler design means faster and easier assembly
There have been several critical improvements to the LongMill MK2 design that makes assembly faster and easier.
First is the overall reduction of 3D printed parts. With the exception of the middle feet and dust shoe parts, we’ve redesigned parts to be made from steel or aluminum. For example, the MK2 Z motor mount design uses a machined aluminum part to hold the motor and lead screw parts together rather than the original combination of a steel and 3D printed part.
MK2 Aluminum Motor Mount3D printed Z motor mount with Z motor plate on the LongMill MK1.
Other parts, such as the front and back feet have also been changed from 3D printed parts to formed sheet metal parts.
We’ve found that one of the biggest pain points for our customers was dealing with inconsistencies with 3D printed parts, such as nuts not fitting correctly and parts breaking. With steel and aluminum parts, we are able to produce them at a higher level of precision, making the assembly a smoother process.
The second is with reducing the overall part variety in the MK2. Rather than making the X rail a two-part assembly joining two rails in the MK1, the MK2 uses one single rail that is not only lighter but more rigid. This eliminates a tricky assembly step but the hardware required to put it together as well.
We also made many of the parts interchangeable. While the MK1 uses 6 different types of the front, back, and middle feet, the MK2 only uses 2 different parts that stand-in for all of the feet. This means that customers don’t need to root around and identify each foot they need for their assembly.
Lastly, we’ve significantly reduced the number of types of fasteners used for assembly. The MK2 now can be assembled completely with two Allen keys, a 2.5mm and 4mm Allen key (included).
Based on our beta testing results, the average assembly time for the LongMill MK2 was 2.5 hours.
Optimized rail design reduces overall deflection by up to 50%
Based on our testing, the MK2 deflects 30% less in the Y-direction and 50% less in the X-direction, using a 10kg load on an end mill. This improvement in rigidity is attributed primarily to the improvement in rigidity of the rails and should allow the machine to run faster, harder, and with a better surface finish.
An example of a simulation done on the computer
Testing the MK2 at 8mm DOC at over 3500mm/min
Other small changes to the LongMill MK2
There are a couple of other small changes that have been implemented on the MK2, as follows:
24V 10A power supplies have been upgraded to 24V 12.5A power supplies. The higher power supply is expected to provide more headroom for stock electronics and allow for easier upgradability for the addition of higher power motors in the future. However, the 24V 12.5A power supplies will only be compatible with North American voltages (110V-120V) and customers that use higher voltages (220V-240V) will need a transformer or alternative power supply to use their machines in their country.
Most hardware supplied will come with integrated lockwashers, helping prevent screws from backing out over time.
Each kit will come with small wrenches and allen keys to do assembly. Customers will still need a drill or driver to mount their machine to a base.
Production timeline
We expect all of the parts needed to start shipping LongMill MK2s to arrive between now and the end of January. We estimate that the first LongMill MK2s will start shipping in the middle to the end of February. However, due to overall delays and issues in the supply chain industry, customers should prepare to have their orders potentially be delayed until March. We expect delays to come primarily from shipping delays from incoming parts.
All of the parts needed to start production are expected to arrive at the end of March/early April. Parts that have already arrived are actively being packed to prep for shipping. For the latest production updates, please see our blog: https://sienci-upgrade3.cospark.io/blog
We will update the estimated shipping and delivery times on the product page.
Please prepare for delays due to material shortages. We are doing our best to keep things on schedule, but sometimes we are hit with unexpected delays and shortages out of our control.
We are currently working towards expanding our production capacity, and we have several things we are working on such as:
Creating outdoor storage and additional storage space to hold more parts
Hiring more packing and operations staff
Hiring more customer support and resource development staff
Purchasing and stockpiling additional inventory
We will keep customers updated through email for:
When their order is being packed (pre-shipping notice)
When their order ships, which includes the tracking number
Answering your questions
We recently put out a call for questions about the MK2. Although some of the questions have been reworded for clarity, I’ve done my best to answer as many questions as possible that may not have been answered earlier.
What is the working area of the LongMill MK2?
The LongMill MK2 30×30 has a maximum working area of 820mm or 32.28″ in the X-axis and 868mm or 34.17″ in the Y-axis.
The LongMill MK2 12×30 has a maximum working area of 820mm or 32.28″ in the X-axis and 368mm or 14.48″ in the Y-axis.
The total Z-travel for both machines is approximately 125mm or 4.9″. Total working area may vary slightly depending on the addition of a dust shoe, inductive sensors, and other add-ons.
For dimensioned drawings, please download the PDF.
Will the older version (the MK1) be available once the MK2 is released?
Once we have sold all of the MK1 machines, they will be discontinued and will no longer be available.
If I have a MK1 on order, can I change my order to a MK2?
If you placed an order for the MK1 and it hasn’t shipped yet, please cancel your initial order and place a new order for the LongMill MK2. The best way to get in touch with us to cancel your order is through our contact form on our website: https://sienci-upgrade3.cospark.io/contact-us/
What software can be used with the LongMill MK2?
Any software that already works with the LongMill will work with the MK2. For a full list of compatible software, please check out our Software Resources.
Will the MK2 be able to support a 4th axis?
No, the MK2 will not come with 4th axis compatibility.
Will there be assembly instructions or videos on putting together the MK2?
Yes, our team is currently working on the assembly manual for the MK2. Videos will also follow to assist users in the assembly process. New resources will be available at the end of January.
Is there an upgrade path from the MK1 to the MK2?
With the number of different parts that are needed to upgrade a MK1 to a MK2, it may be easier to write the parts that can be carried over between the MK1 and MK2, which include:
Motors (with the exception of the Z axis motor)
Bearings
Lead screws
Anti-backlash Delrin Nuts
ACME locking nuts
Motor spacer
Couplers (one extra coupler is needed to complete the upgrade)
Control board and e-stop
Eccentric nuts
Power supply
Delrin V-wheels
Drag chains
At the current time, we are not planning on having an “upgrade kit” for the MK1 to MK2, but we may consider creating one based on customer feedback.
If you want to read more about my personal opinion on whether its worth upgrading your MK1 to a MK2, here is an excerpt from one of my previous posts:
“To also note, for some people who might be wondering, making a dedicated kit to swap out rails and gantries to change a current LongMill to a MK2 is not our priority. We don’t think the extra cost doesn’t justify the real-life increase in performance, we don’t want to create a lot of extra waste, and if a machine is already assembled, most of the benefits that come with the faster/easier assembly is never realized (since you have to take apart and reassemble a machine). We will still offer individual parts on our store for customers (as we already do), so folks can make up their own mind. I’d also like to note that there WILL be a kit to use the original LongMill and add a longer X-axis (48×30 in the working area).”
Also to add onto this, the kit to extend the X-axis from 30 inches to 48 inches will work for both the MK1 and MK2.
Is the price increase from the MK1 to the MK2 justified?
There will be approximately a 20% price difference between the MK1 and MK2.
The price increase between the two versions comes due to several factors, both internally and externally.
The first reason for a price increase comes from the fact that the MK2 costs more to manufacture. Over the past two years, we’ve experienced price increases in nearly all parts and materials across the board. Although we’ve been able to keep our prices low as our scale overall reduced other costs through the power of economies of scale, we now produce a high enough volume of machines that any increases in volume have less of an impact on the unit cost of each machine. We also expect that prices for parts to continue to rise over time, and this price increase accounts for overall increasing costs.
The second reason is the demand and capacity that we can handle. At the current time, wait times for MK1 continue to be long and we expect that it will still take us a few months for us to scale up to handle the growing demand. This price increase is to help reduce overall demand as we continue to scale production up at our shop.
And lastly, we believe that the MK2 is simply a better overall machine. Although the improvements between the machines are generally incremental, we believe that the performance and quality improvements justify a slightly higher price tag.
When will the LongMill MK2 ship?
03/02/2022 EDIT: Due to shipping delays pre-orders are now expected to ship end of March, see February production update here.
Pre-orders are expected to ship starting mid-February. However, not all parts and materials have currently arrived for the MK2, and are subject to production delays. Additional updates on production will be provided as production continues. Customers should prepare for potential production delays in the case of supply chain issues.
When will the LongMill MK2 30×48 and the extension kit be available?
Parts for the larger version of the LongMill have been ordered and are in production. We expect parts to arrive at the end of February and the kits to be ready soon after. A pre-order page will be available around the end of January or February.
Do you take the payment now or when the order ships?
Full payment is required to hold your place in line. You can request a cancellation with no penalty or cost at any time before your machine ships.
Is there any way to get my order sooner?
No, all orders will be shipped in queue of when the order was placed. There are no exceptions.
Are you looking for any beta testers or reviewers?
No, our beta testing program is now closed. Thank you to all of our beta testers who have been working with us to test and make improvements to the MK2.
Will the LaserBeam or any other laser work with the MK2?
Any laser that currently works with the LongMill will work exactly the same with the MK2 and the LaserBeam will be fully supported with the MK2.
Will the MK2 support any spindles?
At the time of release, no. However, we are planning to be working on spindle options in the second half of the year that will be compatible with the MK2. Users however are welcome to add third party spindles and we sell different size router mounts on our store (up to 80mm).
Would adding an extra set of rails to the front and back of the machine improve stability or squareness?
Although the answer is technically yes, for most users, having a sturdy bench and following our installation instructions will still offer the fastest and easiest way to set up their machines. For users who wish to do additional modifications, all of our 3D CAD design files will be available from our resources in the coming weeks.
Is there an upgrade path between the MK1 and MK2?
Since a lot of parts are shared between the MK1 and MK2, a user could potentially swap some of their parts from the MK1 to the MK2. However, in my personal opinion, if you’ve already set up and assembled a MK1 already, the differences between the two machines are not large enough to be worth spending the time and money to upgrade.
That being said, we will make the extension kits work with both the MK1 and MK2, so if you will not have to upgrade your machine to be able to extend the X-axis.
Will this be a Kickstarter?
No, we will allow customers to place orders directly from our website.
Will there be any custom size options?
At this time, no, but since we have recently purchased our own extrusion cutting saw, if there is enough interest, we may consider offering machines in a larger variety of sizes.
Does the MK2 come with limit switches?
The MK2 can be ordered with a set of optional inductive limit switches. Since the MK2 has been designed with limit switches in mind, they will have a more robust installation compared to the MK1.
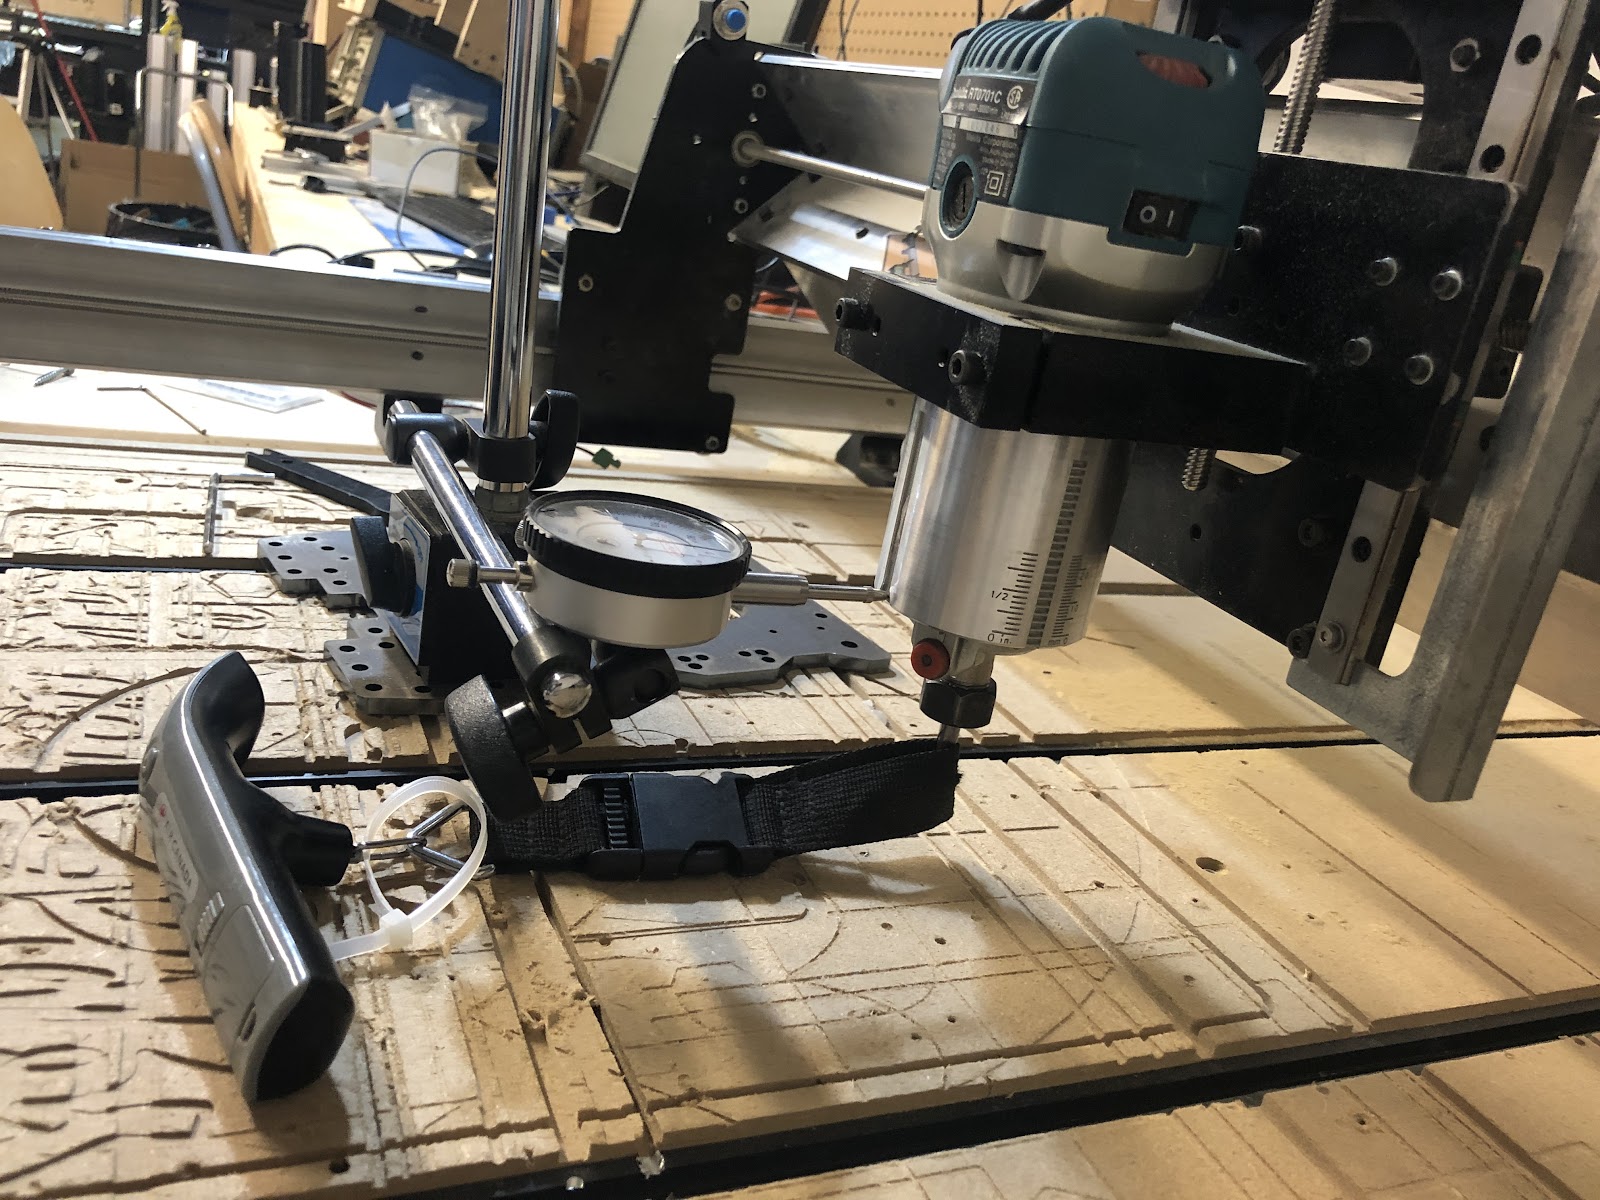
Will there be a built-in way to tram the MK2?
The MK2, like its predecessor, will not come with a tramming system found in some higher-end machines. Assembling the machine following our instructions will result in a machine trammed close enough for nearly all woodworking projects. However, for users who wish to explore tramming, the mounting method for the X-axis will allow for easier rotation of the X-axis and the four bolts holding the router mount on the Z-axis will be reachable when the machine is fully assembled, allowing adjustment on the A rotation axis easier.
How confident are you in being able to ship the MK2 on time (in February)?
To provide full transparency, I am expecting that there is a high chance that there will be minor delays in production. The production on the first batch of any product is always a bit hairy, with the MK2 being no exception. At this current time, nearly all of the parts for the MK2 have been ordered, in-transit, or completed and in our shop. It has been my goal to have all of the parts needed for production to be completed and in our shop before the end of January. Although I feel that the estimate of a mid-February shipping timeline is reasonable given the current production schedule, I would ask customers to be aware that delays are possible, and we will continue to update everyone with regular production updates as usual. Customers should be aware that there is a potential for shipping to be delayed to March.
Add-ons
The LongMill MK2 also comes with a couple new optional add-ons.
The dust shoe has been redesigned to address several complaints from the original magnetic dust shoe, which include:
Bristles being sucked up on especially powerful vacuum systems
Some customers reported having their bristles being pushed into the inlet of the vacuum especially when using more powerful vacuums. The new dust shoe uses:
Shorter length bristles
Additional consideration on the airflow within the dust shoe
Improved bristle mounting
Reduced X-axis travel
While the original version of the dust shoe reduced the X-axis travel by approximately 33mm, the new design should only reduce the X-travel by about 5mm*.
*Please note that some parts of the design are still in progress, and this amount may change.
Finicky front window
We had a transparent window that was prone to breaking. We changed the window to a softer material, which mostly solved this issue, but having the window also provided additional leakage of dust based on the alignment between the window and the rest of the bristles.
The new design removes this window completely and focuses on improving visibility through the top acrylic part of the body. Since the new dust shoe has a lower profile, it is easier to see the bit from above.
The LongMill MK2 now comes with an additional option for a dust shield for the Y-axis lead screws. These shields help keep dust away from the lead screws and nuts, especially when cutting without a dust shoe or dust extraction system.
We recommend this product to customers if they are:
Cutting abrasive materials such as carbon fibre, fiberglass, and ceramics
Not using a dust collection system
Have a messy workplace and want to prevent tools, debris, materials, wires, and other items from getting caught in the wheels of the Y-axis.
Each dust shield is easily installed and removed with a set of M5 screws on the front and back feet of the machine.
Please note that the lead screws and Delrin nut system used on all LongMills are designed for use in dusty environments, and for most users, the dust shield only serves a limited benefit.
Other add-ons
The Makita RT0701 and Touch Plate will also be available for order through the product page and are identical to the ones currently sold with the LongMill MK1. Inductive sensors will also be offered as an add-on with the new machine, which will work the same as the MK1. For a full list of add-ons for sale, such as lasers, t-tracks, and software, please see our Add-On category of our store.
Hello all Laser customers, Monday December 20th we began shipping our LaserBeam pre-orders out. I am working everyday to make sure we can get our first 300 pre-orders out the door before the end of the year.
I will be in the office next week, testing, packing and shipping LaserBeams.
I made the decision to begin shipping before our resource section was live because I did not want to delay shipping while I finished our resource section.
Each laser and laser driver is tested before shipping and I will have resources posted before Thursday end of day.
For now I will be providing the User/Safety Manual pdf with our tutorial video that was made for the Youtube Channel earlier this year for those who have received your Laser before Thursday.
*Very important: If you are a customer looking to order a LongMill this month, please read this part carefully.
Due to low stock and high demand, our lead times for the LongMill are now extended to 4-6 weeks. New orders will not ship before Christmas. We are now limiting stock and customers may not be able to order once we go out of stock on our machines. A pre-order page for the LongMill MK2, the new version of the LongMill is scheduled to be available at the end of December, and orders for the LongMill MK2 will ship at the start of February. The new LongMill will have adjusted pricing that will be released at a later date, but are estimated to be around $1800CAD for the 30×30 version.
If you are interested in learning more about the differences between the MK2 and the original version of the LongMill, please read our development posts from our blog here: https://sienci-upgrade3.cospark.io/?s=longmill+MK2. More information will come soon.
Because of our shortage of parts, new orders (starting Dec 10, 2021) will start to use some of the parts that may have cosmetic defects on gantry plates and rails which do not affect the overall performance and use of the machine. We expect most customers to not even notice the cosmetic defects. All machines will come with the same high quality customer service and technical support, as well as the standard 90 day warranty.
Also, not all parts will have a cosmetic defect, as you may, for example, have a cosmetically perfect set of rails and one gantry that has a scratch. All parts are carefully inspected before being packed and shipped.
Some examples of scratches, dents, and other cosmetic dings
Every rail we ship out gets checked for:
Dimensional accuracy
Dings and dents that may impede with the travel of the v-wheels along the edge
Cosmetic damage
While the first two criteria are critical to making sure that the LongMill works, cosmetic damage along the sides and inside of the rail does not impact the performance and functionality of the machine. Rails that were rejected due to cosmetic damage but not from the first two criteria would be used in this version of the machine.
Every gantry plate gets checked for:
Paint defects, such as chipping and orange peel
Gouges and scratches
Uneven paint
Plates, such as the one shown above show orange peeling and would be rejected in production. This may be caused by contamination on the plate surface before coating, but overall does not affect the use and performance of the machine.
Why did we make this decision?
Our goal is to use the remaining stock of rails and gantries to bridge the gap between when we’ll be able to restock on parts again in January and February. Between each batch of production, we’ve kept our functional but cosmetically imperfect parts in storage. Using up these parts will help us use excess materials and clear out space for new inventory, as well as keep our lead times lower.
This is actually not the first time we’ve done this. On some rare occasions where we run out of a part and are waiting to restock, we’ve asked customers if we can provide them with imperfect parts, and all of our customers preferred to get their machine a week or two earlier, rather than wait till the new parts arrived.
Although we have considered remaking or repainting the rest of the parts, this would extend the lead time significantly, as new parts can take upwards of 8 weeks to produce. Instead, we figured we would let the customer know that some of their LongMill parts may be cosmetically imperfect, and let them make the decision at purchase.
LongMill MK2 Production
We’ve slowly started to gather parts for the production of the LongMill MK2. In our last update, we talked about the extended lead times for the MK2’s aluminum rails. It just happens that Almag was able to rush order the rails and have them dropped off a lot earlier than expected. Yay!
On top of this, we have also received full or partial shipments of:
Linear guides
Lead screws
Fasteners
Delrin nuts
Z motor mounts
Drag chains
There are still a lot of parts that are in transit and production, such as:
Control boards
Power supplies
Motors
Couplers
Packaging materials
We are crossing our fingers that these parts will arrive by the end of December or early January.
Holiday schedule and office closures
Please note that our offices will be closed from Dec 24th to Jan 3rd. We will be back in action and shipping again on Jan 4th.
If you have any orders that need to be shipped out before the holidays, please place your orders before Dec 23rd so that they can be shipped out before we close.
Over the past few weeks we have finalized our design for the driver case, air assist and laser shield. We have placed an order with a local PCB manufacturer, and they are on track to complete our laser driver PCB December 17th. Our focus now is to have all parts packed and assembled so that when the driver PCBs arrive, it will be the only part of the laser to assemble, pack and we can begin shipping.
The specific milestones below have been completed since the last update:
Ordered our driver PCB Assemblies in bulk
Finalized our design for the driver case, air assist and laser shield and begun production on these parts
Completed FDA submission documents
The roadmap for the rest of the month is as follows:
Receive completed driver PCBs [Dec 17th]
Test drivers [Dec 18th-19th]
Begin driver assembly and shipping [Dec 20th-23rd], shipping out our first 300 LaserBeam pre-orders
Next Tasks
Regulations
Our FDA submission documents are being reviewed and will be sent out December 13th
Production
Get final packaging foam prototyped and cut
Continue 3D printing and laser cutting parts
Assembly
We have assembled 300 laser diode assemblies (which includes the heatsinks and laser diode, not the driver)
We have received our steel laser mounts and will assemble to the laser diode assembly with compliant safety and product stickers
Assemble the PWM signal cable, the last cables to be assembled
Check out the link above if you need to order additional LaserBeam accessories that you didn’t order in your original LaserBeam preorder. You won’t be charged any additional shipping and your order will be combined with your LaserBeam Pre order!
Check out our LaserBeam FAQ video, I take all your unanswered questions from the LaserBeam livestream and try to give you guys more clarity on the LaserBeam add on.
Stay up to date by signing up for our mailing list
Hey everyone, we’ve been getting a lot of calls, emails, and messages asking if we’re planning on doing any Black Friday Sales. Unfortunately for this year, there will be no Black Friday discounts. Due to extremely high and growing demand for the LongMill, as well as overall shortages and challenges in the supply chain, we believe that offering any sales or discounts at this time will further overwhelm our production and packaging.
Thank you everyone for their continued patience and support!
For additional info about our company and production, please feel free to check out our Production Updates: https://sienci-upgrade3.cospark.io/2021/11/17/november-production-update-pt-2/
These past couple of weeks has been a bit stressful, as we continue to deal with delays in supply chain. I’m happy to announce that the new control boards that we’d been waiting on in the last update have finally arrived and we have started shipping machines again. We expect to get through the backlog over the next couple of weeks.
We also now have touch plates back in stock as well.
The end of Batch 5 is coming
We are quickly reaching the end of Batch 5, and expect to be out of stock on Batch 5 machines in around 3 to 4 weeks. Customers should expect lead times for machines to get much longer as we work on parts for Batch 6 to finish.
If you aren’t familiar, we build machines in batches. In this case, Batch 5 is 1000 machines.
In the meantime, there are a few things we can continue to do, such as extending Batch 5 by balancing the inventory and using all of the leftover parts and hardware to keep making kits beyond 1000 machines. This could also mean pulling inventory coming in for Batch 6 to use for Batch 5, as we wait for all of the Batch 6 parts to arrive.
Once we get closer to the end of Batch 5, customers should expect lead times to go up, possibly to 4-6 weeks.
Current supply chain and production issues
One of the major hurdles we’re currently dealing with is the long lead times with aluminum extrusions. With our current manufacturer, we’ve jumped from a 2 week lead time to 13 week lead time between September and November, meaning that our order for rails placed this month is expected to complete sometime between January and February. I’ve “rush ordered” these parts so that we try to have them in stock by the start of January, but this all comes down to scheduling at the press. I’ve also reached out to other presses in the area, but most have even longer lead times.
To account for the unstable lead times, we’ve been working on installing our own cutting and tapping set up to cut and tap our own rails. This should allow us to have more control over the lead times, as we don’t have to worry about the extra machining time that the manufacturers need to have added on top of the total production time.
Our new saw
In other news, we are likely going to see gaps in shipping based on shipping delays. For example, although we have allocated the v-wheels for the machines in Batch 5 for pending orders, the batch that we are waiting for to be able to complete the batch have been delayed in transit for about 2 weeks. Although I expect to see the wheels before we finish shipping the pending orders, any additional delays may cause a gap in shipping again as well for new customers.
Lastly, lead times for cardboard packaging have gone from a few weeks to around 10 weeks now, which means that we’ve started working early on manufacturing the packaging for Batch 6 machines.
All in all, although we are doing our best to keep production going, customers should expect longer lead times on LongMills.
We have received our rough report from the testing facility and our main product design has successfully passed as a laser component. In order to qualify as a laser component, we had to remove continuous maximum power mode, which makes the LaserBeam reliant on the PWM signal that comes from the Longmill controller. Thus the driver design is officially completed!
The specific milestones below have been completed:
Pass IEC 60825-1 tests
Receive testing report
Next Tasks
Supply Chain and Regulations
Place an order with a local PCB manufacturer to make and assemble board components with short lead time
File all reports with the FDA (we do not need to wait for report review before shipping out lasers)
Design
Finalize the design for the driver case and air assist
To increase user safety, we plan to design a simple laser shield that can help avoid laser radiation from interacting with the user
Assembly
Currently assembling our laser diode, heat sinks and cooling fan
Then will finish adding connectors to the driver fan, laser assembly and laser diode extension cable
Check out the link above if you need to order additional LaserBeam accessories that you didn’t order in your original LaserBeam preorder. You won’t be charged any additional shipping and your order will be combined with your LaserBeam Pre order!
Check out our LaserBeam FAQ video, I take all your unanswered questions from the LaserBeam livestream and try to give you guys more clarity on the LaserBeam add on.
Stay up to date by signing up for our mailing list
On November 2nd we sent off our 7W LaserBeam product for independent testing. With the help of the test project coordinator, we will ensure that our product meets all Class 4 laser product requirements. That could mean making changes to the driver design and/or improving our safety/user manual.
Next Tasks
Safety and User Manual
While we wait to hear back from the test project coordinator we will continue to have our packers assemble parts that we are confident in, and would not be affected by the results of the testing.
Parts to assemble:
Laser diode extension cord
PWM signal cord
Laser diode heat sink assembly
Laser cooling fan
As we wait for updates from the independent testing facility, we will continue to plan ahead for Batch 2, to avoid future delays in shipping. Batch 1 includes the first 300 pre-orders, scheduled to deliver by end of the year.
Supply chain tasks:
We will be upgrading our acrylic router mount to zinc plated 10GA sheet metal
This will further reduce any vibrations that come from the laser cooling fan or LongMill movement
We will begin ordering more parts for Batch 2 of the LaserBeam production, which should take 1-2 weeks
Copper heat sinks
Safety glasses
A/C power cables
Laser diodes
Once the Laserbeam passes testing, we can order the driver PCBs
Check out the link above if you need to order additional LaserBeam accessories that you didn’t order in your original LaserBeam preorder. You won’t be charged any additional shipping and your order will be combined with your LaserBeam Pre order!
Check out our LaserBeam FAQ video, I take all your unanswered questions from the LaserBeam livestream and try to give you guys more clarity on the LaserBeam add on.
Stay up to date by signing up for our mailing list